20 Ideas on How to Extend a Patio
Are you stuck with a cramped existing patio that can't accommodate your growing family gatherings or relaxation needs? From building lounge areas to letting homeowners dine under the stars, we've transformed limited spaces into functional outdoor areas. With these patio extension ideas, you can accommodate more guests and create an additional area for dining or entertainment.
Patio Extension Ideas
Patio features range from structural foundations like flagstone, concrete, and pea gravel bases to entertaining essentials such as a full kitchen, cozy fireplace, and dining spaces with beverage bars. Beyond functionality, you can create wellness retreats with spa lounges and enhance aesthetics with a vertical garden. You can also add multi-purpose elements, like shaded workspaces and practical storage solutions.
Are you facing challenges extending your patio, or don't know where to start? At Aviara Pavers, we have experts who can help you with the patio extension work at an affordable price. Our company follows ICPI guidelines for installing pool decks, patios, walkways, and driveways.
| Extension Features | Key Ideas |
|---|---|
| Structural and material elements | Establish a solid space using durable stone pavers or budget-friendly pea gravel for a contemporary backyard layout. |
| Entertainment and social spaces | Expand your footprint to include a permanent dining table and a built-in fire pit for group gatherings. |
| Relaxation and wellness spots | Make a tranquil sanctuary featuring a small pond and comfortable seating for peaceful meditation. |
| Visual and decorative enhancements | Make a tranquil sanctuary featuring a small pond and comfortable seating for peaceful meditation. |
| Multi-purpose spaces | Maximize utility with a patio roof for shade, storage benches, or a dedicated workspace. |
Structural and Material Foundations
A patio extension expands the footprint with durable materials, such as stone, that provide a solid foundation for years of enjoyment. Our patio specialists can build a structurally sound patio extension that seamlessly integrates with your existing layout.
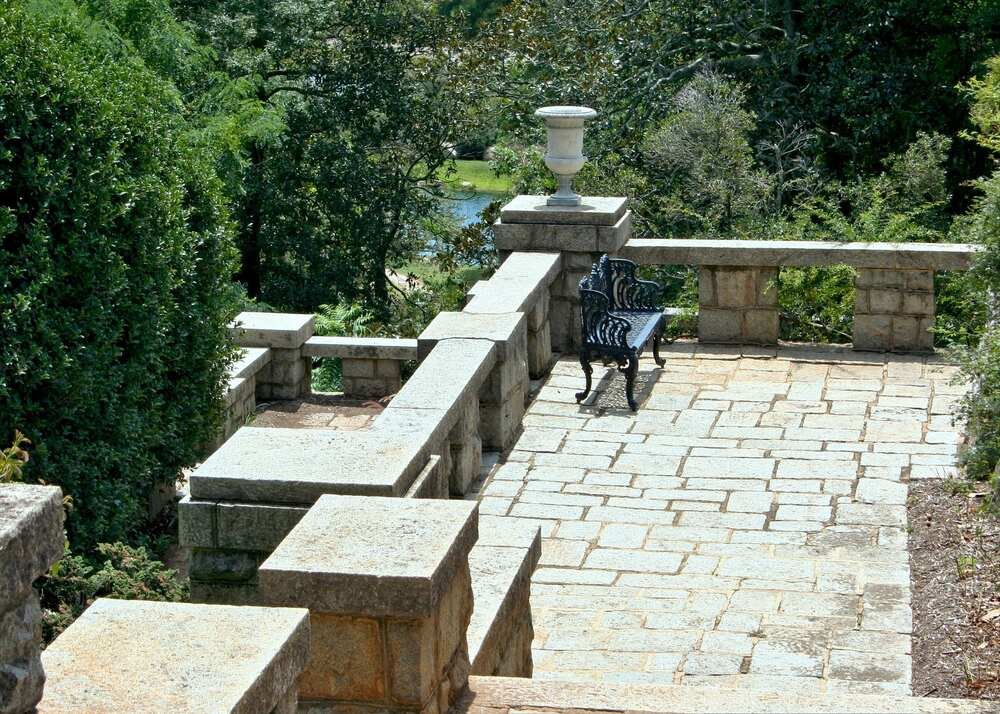
1. Flagstone or Natural Stone Extension
A flagstone patio extension uses textured natural stone arranged in organic shapes to make a durable outdoor surface. The best part about this patio extension idea is that it seamlessly blends with your backyard's existing designs while offering timeless beauty and weather resistance.
Best for: Ideal for homeowners seeking a high-end, rustic aesthetic who want their patio extension to complement natural landscapes or traditional architectural styles.
Design considerations: Natural stone requires a well-compacted gravel base and sand setting bed. Irregular pieces need to be fitted together like a puzzle, and joints need to be filled with polymeric sand or ground cover for stability.
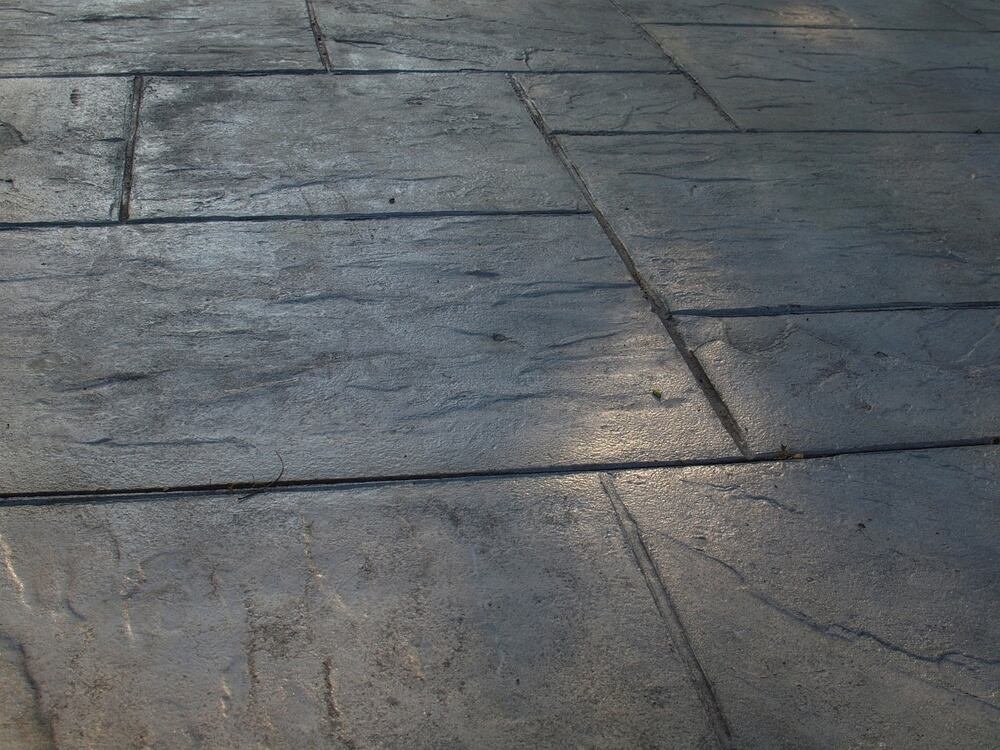
2. Concrete and Pea Gravel Pairing
Are you looking for patio extension ideas on a budget that offer sophisticated space without the high cost of full masonry? We can build solid concrete pads with surrounding sections of pea gravel to achieve a clean look.
Best for: This budget-friendly option is great for those looking to cover a large space quickly and those who prefer the look of a stamped concrete patio.
Design considerations: The sections must be poured with proper expansion joints to prevent cracking under temperature changes. The gravel areas require a high-quality landscape fabric underneath to stop weeds from poking through the stones.
3. L-Shaped Geometric Extension
Here’s a great way to increase an outdoor space while defining separate functional zones. An L-shaped geometric extension makes a distinctive silhouette by extending one side of a rectangular patio with a perpendicular stone addition.
Best for: Best suited for homeowners with corner lot layouts or those wanting to wrap their patio extension around landscape features or architectural elements of their home.
Design considerations: This configuration requires a careful intersection point where the two sections meet. Additionally, it gives level transitions and consistent material patterns across both arms of the L-shape.
4. Elevated Multi-Level Transition
Verticality creates a sense of depth that makes a small backyard feel significantly larger. We can design a structure that uses a stairway to connect an upper deck or patio to a lower stone extension.
Best for: This is specifically designed for properties with sloped terrain or properties with high foundation lines.
Design considerations: Building levels require careful calculation of "rise and run" for the steps to meet local building codes. Our paver specialists may also need to install additional drainage systems to manage water runoff between the different elevations.
Entertaining and Social Hubs
Patio extensions can provide a primary gathering spot for hosting guests, letting you savor dedicated entertainment areas in your backyard. Our patio installers can help you design a patio extension with strategic layouts that keep everyone comfortable and conversation flowing naturally.
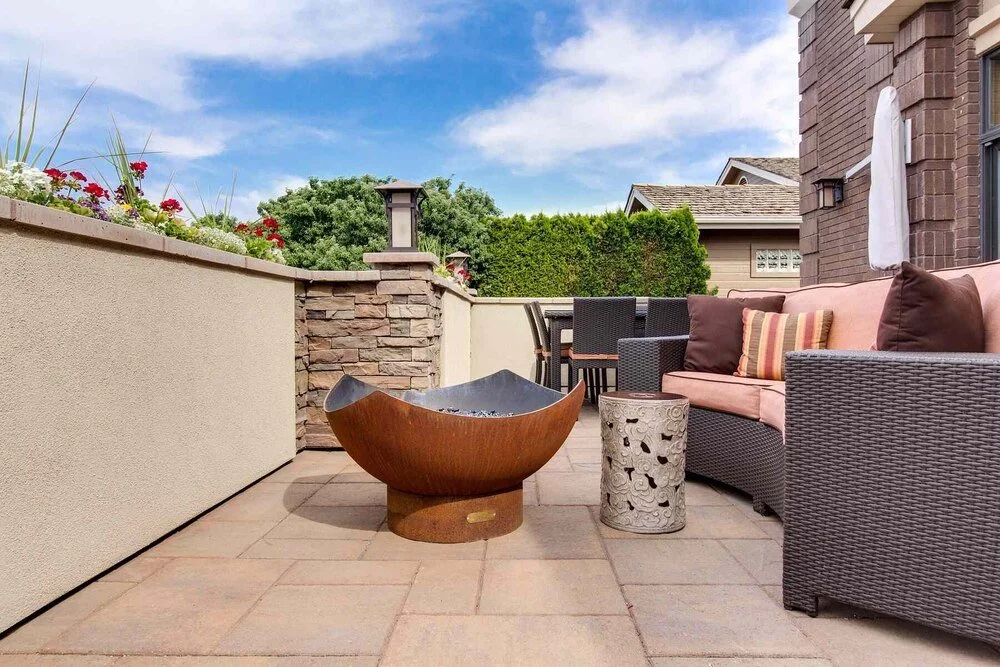
1. Integrated Fire Pit or Fireplace
Do you need a way to provide warmth and draw people away from the main dining table into a cozy gathering space? We can construct a stone-paved patio extension featuring a built-in fire pit or fireplace serving as a natural focal point.
Best for: Perfect for homeowners who love an inviting, year-round atmosphere with both a functional dining area and a comfortable space.
Design considerations: Requires proper stone foundation work, gas line or wood storage planning, adequate ventilation clearances, and often local permits.
2. Full Outdoor Kitchen With an Outdoor Dining Area
This extension results in a permanent cooking station complete with a built-in grill, ample prep space, and a dedicated dining space. By moving the heart of the home outside, this outdoor kitchen lets hosts interact with visitors while preparing meals on a durable stone surface.
Best for: This is a must-have for the serious home chef who wants a large patio extension to separate the heat of the grill from the seats.
Technical considerations: Installing a kitchen requires extending utility lines for gas, electricity, and water to the stone island. The flooring must be perfectly level and slip-resistant to guarantee safety while carrying heavy trays of food.
3. Built-In Beverage Bar
Another way to add entertainment is to serve drinks at a bistro table without taking up space on your main patio extension. Consider having a dedicated bar area with counter seats, a beverage fridge, and a built-in sink to bridge the lounge and dining zone.
Best for: Best suited for entertainers who want a defined casual spot for cocktail hours and social mingling while maximizing the patio extension space.
Design considerations: Requires weather-proof materials as well as plumbing and electrical outlets for the beverage fridge. You’ll also need thoughtful placement to make sure the bar doesn't crowd the dining table in your patio extension.
4. Outdoor Cinema and Audio System
Turn your stone patio into a high-tech media center by integrating weather-resistant tech, like TV mounts and built-in speakers. This patio extension idea uses smart seating layouts to make a theater-like atmosphere that makes the entire outdoor space feel like a premium entertainment area.
Best for: This engaging space is the ultimate choice for sports fans who want to host game-day viewings or movie buffs who enjoy "cinema under the stars”.
Design considerations: Wiring must be kept in protective conduits to protect it from moisture. We can guide you in determining the orientation of the screen to minimize glare during the day and light pollution at night.
Relaxation and Wellness Retreats
A patio extension can also provide more space to lounge and create a private sanctuary for stress relief and peaceful relaxation. Let our patio professionals build a patio extension that incorporates comfortable lounge areas tailored to your personal retreat vision.
1. Covered Pergola or Cabana
Do you want to transform your backyard into a luxury resort by adding a design that defines your relaxation space? Here’s a patio extension that uses a wooden pergola or cabana to create a dedicated space where you can sit and relax.
Best for: This is perfect for homeowners in hot climates who need consistent shade.
Design considerations: You must keep the footings securely anchored to your existing patio or the ground to support the weight. Depending on local codes, you may need a permit for a permanent structure, especially if it attaches directly to your home.
2. Spa or Hot Tub Decking
This patio extension highlights a dedicated platform for a hot tub or plunge pool, enhanced with stone surfacing, potted plants, and a privacy wall. It’s a great way to enjoy a warm, secluded space where you can relax in therapeutic water.
Best for: Perfect for wellness enthusiasts and those seeking a private retreat, especially homeowners with adequate space and budget for ongoing maintenance.
Design considerations: Tub installations require reinforced decking or stone foundations to support significant weight (often 3,000+ pounds when filled). Aside from proper electrical and plumbing hookups, there also needs to be adequate drainage around the patio extension.
3. Tranquil Water Elements
Incorporating elements such as a spillway, fountain, or small pond into your patio extension creates a calming ambiance through flowing water. Additionally, stone and glass elements serve as inspiration for a peaceful outdoor area.
Best for: Suited for homeowners seeking a meditative atmosphere and those willing to invest in features that provide sensory relaxation.
Design considerations: Water feature installations require proper electrical wiring for pumps, water-resistant foundation work. There should be adequate drainage systems to prevent spills and flooding.
4. Hammock and Swing Nooks
Among our best works is creating a cozy corner, specifically designed for napping, reading, or resting, with suspended seating. With built-in hooks on existing walls or overhead beams, you can turn a simple patio extension into a playful spot for chatting or solo quiet time.
Best for: This setup is perfect for families or individuals who prefer a "low-tech" way to unwind and enjoy a swinging bench or hammock.
Design considerations: It’s vital to test the structural integrity of the beams or posts before installation to make sure they can handle dynamic weight. This is why we use heavy-duty hardware for safety and to prevent rust.
Visual and Decorative Enhancements
Our patio extensions add room for finishing touches that construct extra space and complement your house's aesthetic. Our patio installers can design a patio extension that brings cohesive style to your outdoor room with decorative elements that enhance your home's appeal.
1. European-Inspired Tiling
Start with an aesthetic that constructs a luxe oasis feel and serves as a stunning focal point for your patio extension. Incorporate blue and white patterned tiles to transform a standard slab into a sophisticated Mediterranean retreat.
Best for: This is perfect for homeowners who want to inject an artistic personality into their backyard without adding bulky furniture.
Design considerations: The existing sub-base must be perfectly level and crack-free to prevent the tiles from shifting or popping over time. Pick “anti-slip" outdoor-rated porcelain or ceramic to keep the surface safe when wet.
2. Zoning With Outdoor Rugs
This idea helps define the space within a large patio extension. It makes a vast expanse of space feel like a cohesive, multi-functional room.
Best for: Those with open-concept patio extensions who want flexible, budget-friendly space definition that can be easily changed seasonally.
Design considerations: Choose UV-resistant, water-permeable outdoor rugs. Installation also needs the stone or patio surface levelled to prevent tripping hazards.
3. Vertical Gardens and Privacy Walls
Integrating trellises, wood slats, or a lush living wall adds a layer of organic texture while blocking the view from nosy neighbors. These design ideas enhance the privacy of your patio extension while maximizing the green space available in your patio design.
Best for: Urban homeowners or those with close neighbors who need privacy screening while maximizing usable floor space in their patio extension without sacrificing style.
Design considerations: Prepare secure anchoring into stone footings or the patio framework. You can consult our patio installers for irrigation systems and plant selections suited to your sun exposure.
4. Tiered Pathway Lighting
Here’s an excellent idea to highlight the texture of the stone and create a warm, inviting glow that extends the usability of your space into the night. We can install a combination of path lights and low-profile accent lighting to keep your patio extension safe and visible after sundown.
Best for: Safety-conscious homeowners who entertain in the evenings and want to highlight stone pathways and architectural elements.
Design considerations: Plan your patio extension's electrical layout early. We can bury low-voltage wiring beneath stone pavers during construction to avoid costly retrofitting later.
Multi-Use and Functional Additions
A patio extension brings utility to your backyard by creating modern spaces for work and play. Our patio installation specialists can build a patio extension that maximizes versatility with smart design choices.
1. Dedicated Yard Game Zone
Integrating a dedicated yard game zone is a simple way to keep people entertained while maximizing your patio extension. This area can range from a lush turf putting green to a custom-built court for bocce or a level stone pad for cornhole.
Best for: This setup suits anyone who wants a designated recreational area that keeps outdoor gatherings lively without requiring guests to leave the patio extension.
Design considerations: Installation needs to level the ground and stabilize stone surfaces for different game types. Consider drainage requirements, especially if incorporating a custom-built court that sees heavy use.
2. Outdoor Workspace
Transforming a corner of your patio extension into an outdoor workspace allows you to enjoy fresh air while remaining productive. Our patio installers can build a stable flat surface and a comfortable place to sit, effectively adding an extra room to your home without the cost of a full renovation.
Best for: This addition benefits remote workers, writers, creative professionals, or anyone seeking a peaceful alternative to an indoor office space.
Design considerations: Make sure you have access to electrical outlets for devices. You can also request stone or concrete flooring for stability under furniture.
3. Storage Bench Seating
Built-in benches serve a dual purpose by providing ample seating for guests and hidden storage bins for outdoor equipment and tools. This patio extension feature keeps your living space clutter-free by offering a discreet home for cushions, toys, or gardening tools.
Best for: This solution is ideal for homeowners with limited space or anyone seeking convenient access to outdoor supplies without visible clutter.
Design considerations: You'll need weather-resistant benches with hinged or lift-up seats. Our patio professionals can also recommend materials that can support the weight of stored items.
4. Retractable Roof Systems
These patio cover ideas create instant shade on a hot afternoon or open up the patio extension to the stars in the evening. For instance, we can install a retractable awning that acts as a versatile porch roof extension that adapts to the changing climate at the touch of a button.
Best for: This installation suits people living in variable climates or those who want maximum flexibility in their outdoor space without committing to permanent shade.
Design considerations: You'll need to account for motorization and electrical wiring if choosing automated features. Be prepared to handle regular maintenance of the retractable mechanism to prevent mechanical issues.
Things to Do When Considering Patio Design Ideas to Extend an Outdoor Space
Instead of feeling restricted by your current layout, view your backyard as a blank canvas for a patio extension. However, extending a patio is more than just adding more pavers; it’s about intentional design. Here is how homeowners and our patio professionals can work together to bring these ideas to life.
Step 1: Planning the Patio Extension
Planning creates a clear vision for your patio extension. This prevents layout errors, making sure the patio extension integrates seamlessly with your house and existing architecture.
What you can do: Sketch rough ideas for a reading nook, outdoor kitchen, or a fire pit. Map out where you want to create more stone surface area before drafting a formal sketch.
How our patio specialists can help: Our team refines your concept to match the aesthetic and functional needs of your landscape. We can also assess limitations, such as drainage and structural integrity, for a safe build.
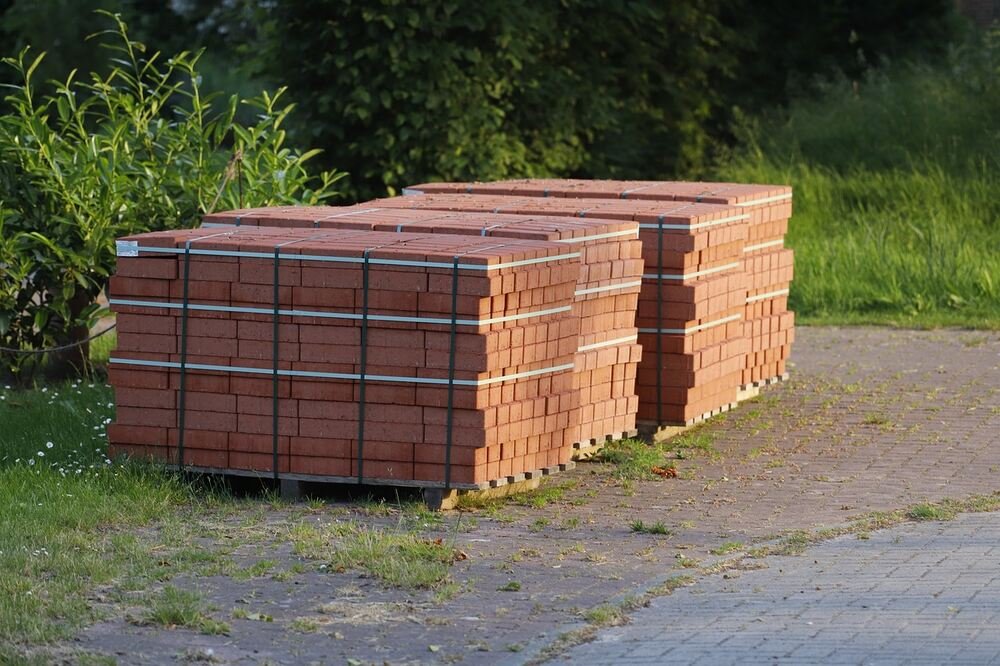
Step 2: Budgeting and Selecting Materials
Budgeting will help understand whether the amount at hand will help complete the project. Strategic budgeting guarantees your patio extension uses high-quality materials like natural stone while accounting for labor, permits, and delivery fees to avoid surprises in the final cost.
What you can do: Decide if you prefer brick, interlocking concrete pavers, or a modern aesthetic. You can also consider cost-saving alternatives to create a beautiful space that stays within your financial boundaries.
How our patio specialists can help: We provide transparent quotes and source durable materials to fit your vision. Our experts suggest the best options to maximize longevity and curb appeal for every unique project.
Step 3: Selecting Furniture
Smart furniture layouts define specific zones within your outdoor space. This can give more room for a dining table or comfortable seating without restricting movement.
What you can do: Measure dimensions for L-shaped or circular sets to allow proper clearance. Select weather-resistant wood or metal chairs that complement the style of your patio.
How our patio specialists can help: We design the space to eliminate tight corners, making sure the surface provides a level room for every furniture. Our team optimizes the floor plan for maximum flow.
Step 4: Installing the Patio Extension
Professional installation results in a stable, weed-free patio extension. Our patio installers will handle technical tasks such as excavation and creating a solid base that protects your yard.
What you can do: Coordinate with the crew during the build. Let our experts handle the heavy lifting while you oversee the transformation of your property.
How our patio specialists can help: We manage site preparation, drainage, and filling joints with sand. Our precision makes sure the foundation is perfectly level and durable for years of outdoor enjoyment.
Related Questions
What Is the Cheapest Way to Extend a Patio?
A simple way to achieve a budget-friendly patio extension is by using pea gravel or crushed stone. This affordable approach allows you to add significant style and texture to your yard without the high cost of permanent masonry.
How Much Is It to Extend a Patio?
Expanding your patio extension generally costs between $6 and $30 per square foot, depending on whether you choose basic materials or complex patterns. Investing in a modern layout can significantly increase your property value while providing a much larger space for outdoor activities.
How Much Does a Covered Patio Extension Cost?
A typical patio extension cost for a covered patio extension ranges from $10 to $30 per square foot based on the materials used. Whether you choose natural stone accents or simple wood beams, adding a roof helps protect your yard year-round.
Conclusion
With these extension ideas, you can turn your patio into a functional outdoor living space that accommodates everything from intimate family dinners to large social gatherings. Once you have chosen your favorite design, our paver specialists can complete a full patio extension to make your new space beautiful, durable, and perfectly installed.